There is no easy, out of the box way to get zone areas both with and without plaster area in Archicad. You could achieve it by modeling the plaster walls as separate simple walls and setting them up to reduce the room area. But to model all plaster manually instead of using composite materials is horrible! With the Room Coverings Add-On you can automate a big chunk of that modeling work. In this post I’ll demonstrate how to use the Add-On to model the separate plaster walls automatically and how to get the room area with and without the subtraction of the plaster area.
Step-By-Step Guide
- Setup a room with
Construction Method: Inner Edge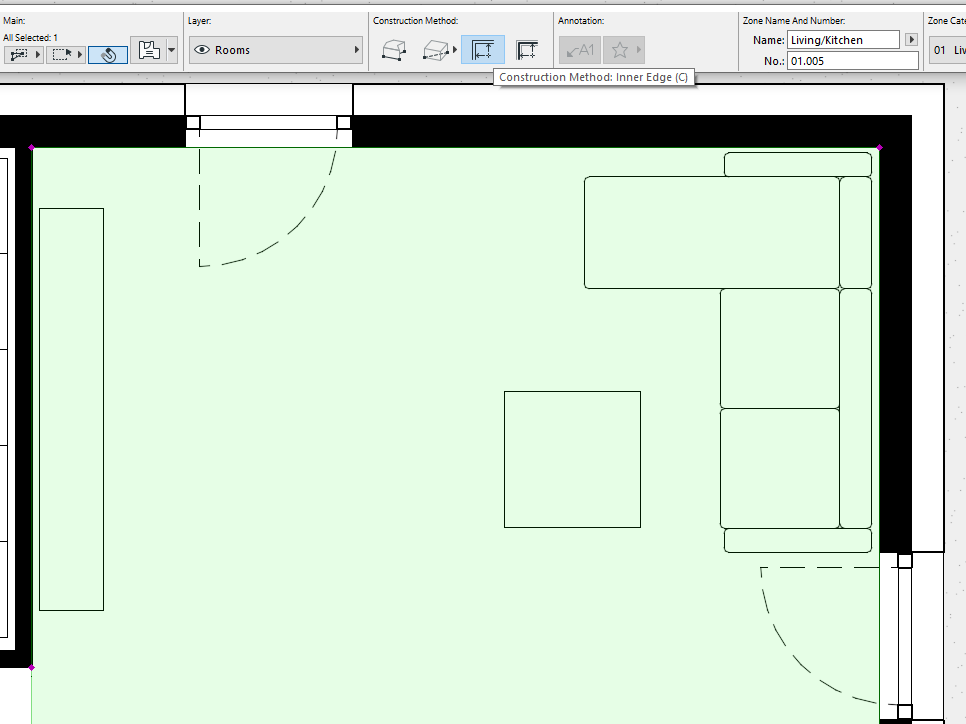
- Setup your plaster wall with
Relation to Zones: Reduce Zone Area Onlyand store it as a favorite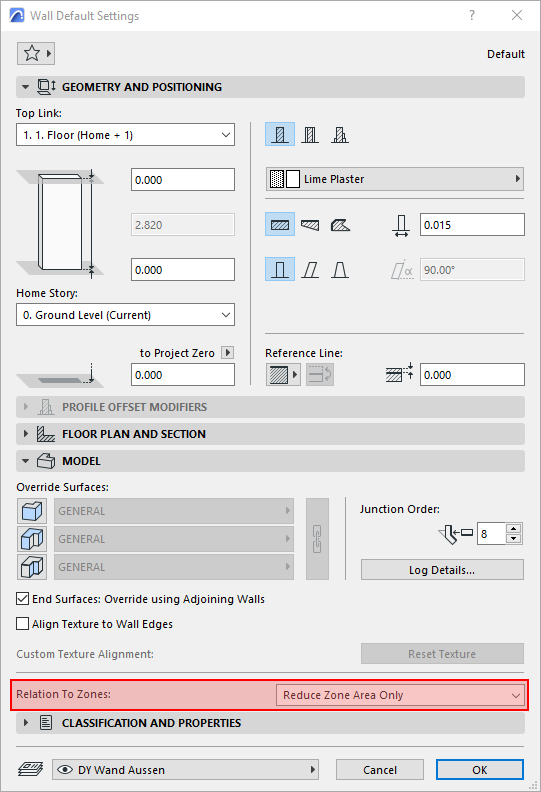
- Use the plaster wall for the wall settings in the Add-On palette, select the zone and execute
Add Room Coverings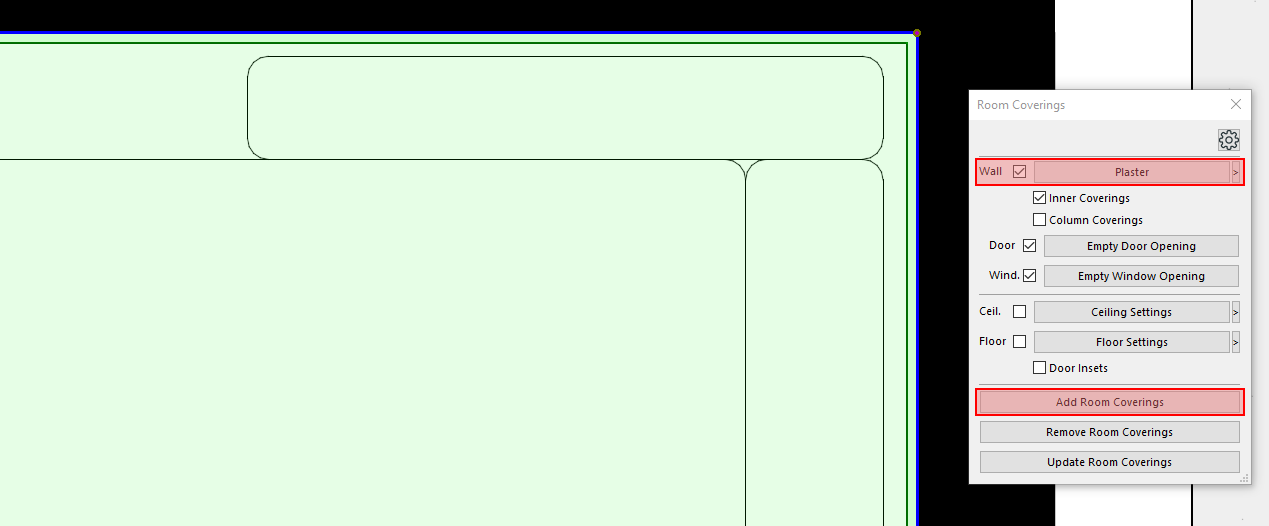
- Update the zone with
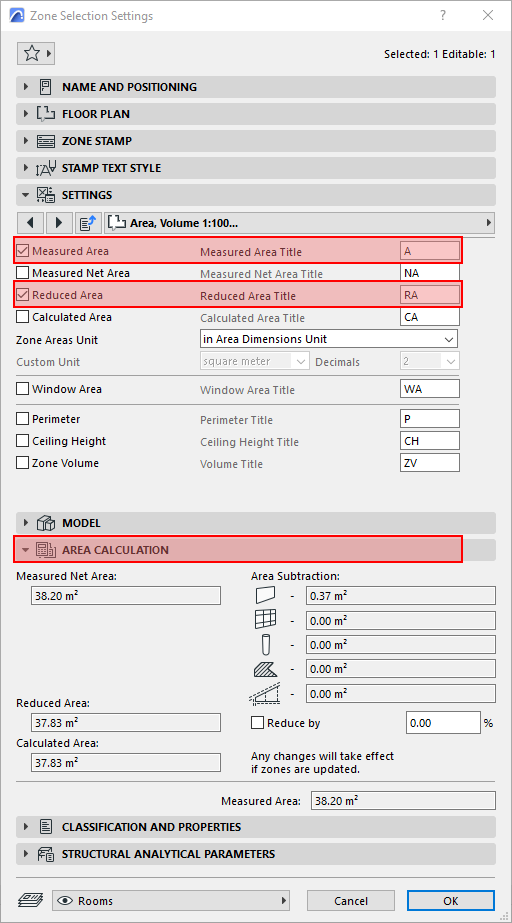
Design -> Update Zones... - Finally setup the zone stamp to display the different area values. The area subtraction due to the new plaster walls happens between
Measured Net AreaandReduced Area. You can check the details of the calculation in theAREA CALCULATIONsection.
Never miss Add-On updates, special price offers or an article! Sign up for the newsletter and you’ll receive roughly one mail per week from me (occasionally more when there’s a special price upcoming).
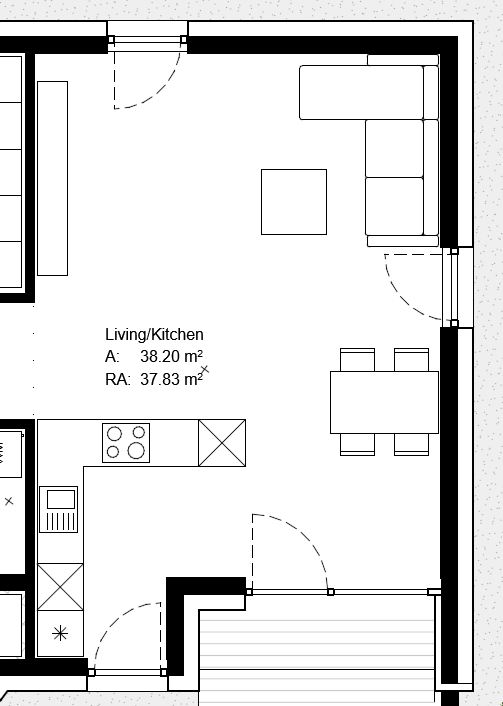
Result
And here’s the resulting zone stamp displaying both reduced and non-reduced room areas:
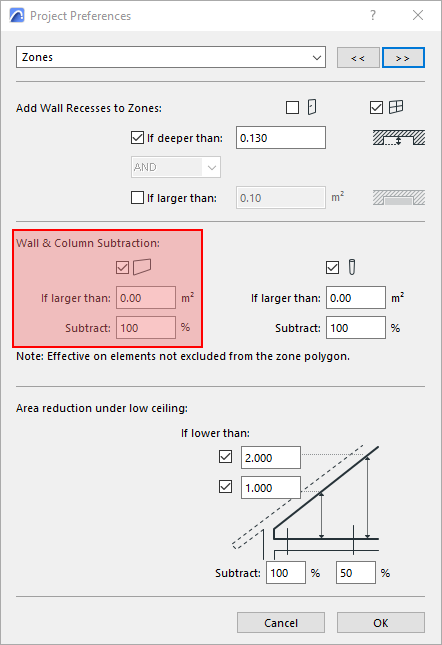
Calculation Note
There’s a zone calculation setting in the project preferences which has an effect on this calculation. To get the most accurate calculation, you can decrease the lower limit for Wall Subtraction to 0.00 m² as shown in the following screenshot. You will need to update the zones after changing this setting.
Try It Yourself
- Download and install the Room Coverings Archicad Add-On. You can add coverings to two rooms with the free demo version!
- Follow the step-by-step guide above to create the plaster as walls and show the room areas in a stamp.
Leave a Reply