There is no out of the box example in Archicad for a wall finish schedule per room. You often end up manually entering materials in the zone stamp or otherwise duplicating the information you already have represented in the boundary walls. Shouldn’t that information come directly out of the model? And managing several different covering materials per room is a nightmare.
Then you keep getting frustrated when trying to make the process fully automated. Maybe you’ve already been searching through all the posts in the Graphisoft Community and Forums. At this point you might even consider paying someone to create a room finish schedule for you, because you get lost in all the minutia of all the pull-downs, parameters and fields.
But what if there were an automatic way after all? If you model coverings as separate wall elements you can use the following approach to get a quick wall coverings schedule per room!
Scheme Settings
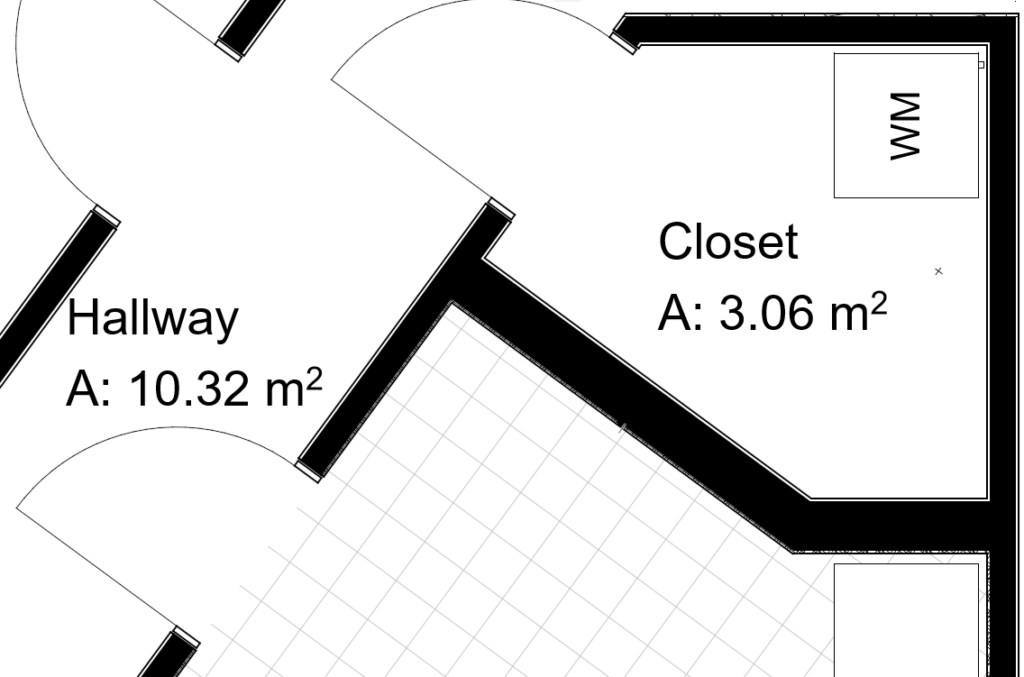
Here’s a closeup of an example model I’m working with. You see the coverings in different rooms modeled as separate walls.
Once you have a project setup in a similar fashion, you can create a schedule schema like the following:
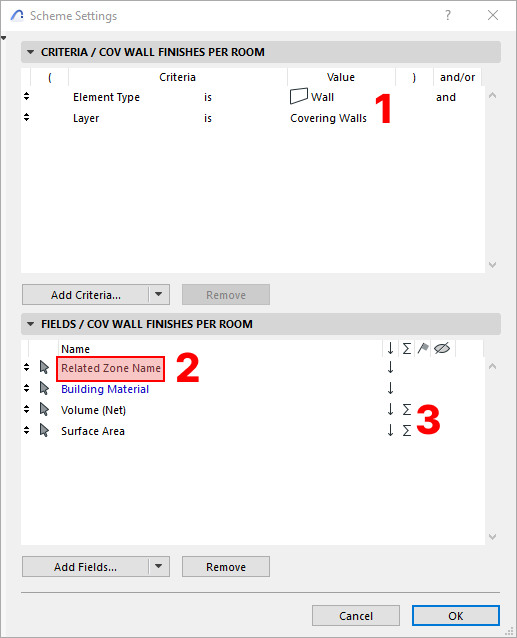
The key settings here are:
- Filter wall elements to only show those on the
Covering Wallslayer - The most essential field is
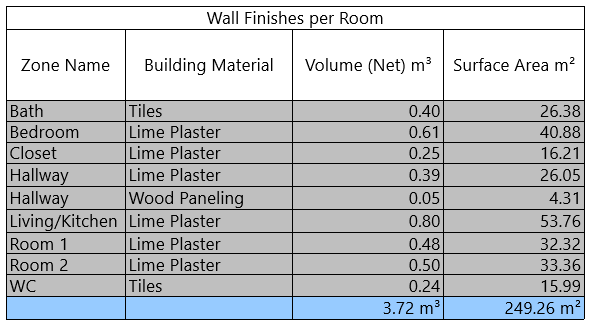
Related Zone Nameto list the zones in which the walls are located - Enable summation for the quantity fields you are interested in
Never miss Add-On updates, special price offers or an article! Sign up for the newsletter and you’ll receive roughly one mail per week from me (occasionally more when there’s a special price upcoming).
Schedule Formatting Tip
Enable the Merge Items checkbox in the schedule style settings to list each material only once per room.

Try it Yourself
- Open your latest Archicad project
- Create a layer named
Covering Wallswith a distinct intersection number - Setup the covering wall settings. I like to use the
Reduce Zone Area Onlysetting. So the room is still bounded by the core wall and the covering walls reduce the zone area but don’t change the zone geometry. This way also theRelated Zone Namesfield picks up the correct zone for the covering walls. - Model the coverings for one test room on the new
Covering Wallslayer with the magic wand or fully automated with the Room Coverings Add-On. - Create a new schedule scheme and copy the above settings
Leave a Reply